Gold Dust Woman
No, this is not a post about blow. Or Stevie Nicks, or how I wish I could wear gold spandex pants as fiercely as Karen O., or my secret life as a glitterati. Ok so maybe I'm not an undercover glitterati, but I was covered in glitter today. That part is true, Girl Scout's honor.
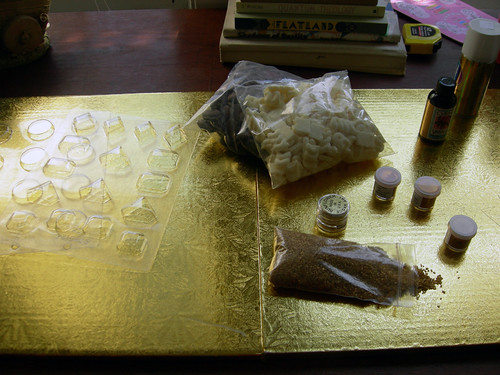
Today I took a little drive to the East Bay in search of some more supplies for my upcoming project for The Armada of Golden Dreams. My friend, Leah- master cake decorator, artist, and all-around awesome lady, recommended that I check out Spun Sugar in Berkeley for some candy making goodies. I promise, no hippies were hurt in the making of this blog post. Really, I promise. I have to say my visit was well worth having to cross that death trap they call the Bay Bridge and pay the $5 toll to boot. Spun Sugar had everything! I was literally a kid in a candy store, or candy making store, if you want to get technical. If you ever need to make something sweet, definitely check this place out. The staff was super helpful and I left with every kind of edible gold product they had (including spray on edible gold which is basically spray paint for your food, and this stuff called DISCO DUST!), 1 lb. each of dark and white chocolate, some gold colored sugar, clear vanilla extract, and two gold cake bases. I took my loot home and and hoped that my experiments today would go better than they had last week.
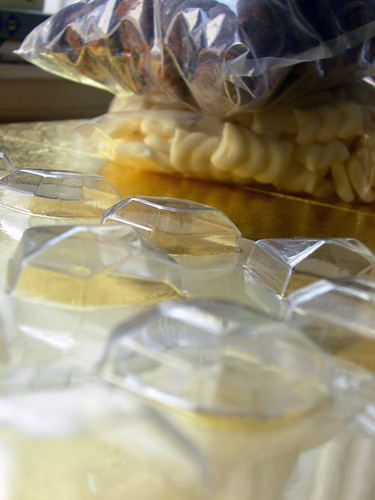
It had come to my attention that the reason I failed so hard at molding chocolate last week was because I didn't temper my chocolate first. Who knew that chocolate was so finicky? Tempering basically re-establishes the cocoa butter crystals that are found in chocolate and this process aids in keeping the chocolate in its best form, giving it a sheen, and the hardness you need for it to be released from the mold. With a little research I learned that tempering was not so easy and I probably wanted to avoid it at all costs, considering the amount of chocolate I was going to be molding. I happened to find some chocolate at Spun Sugar that didn't require any tempering. All I had to do was pop it in the microwave and pour it into the molds. And I did just that. The chocolate melted beautifully and it had to harden the same, it just had to, otherwise I was going to lose my temper. Ba dum CHING!
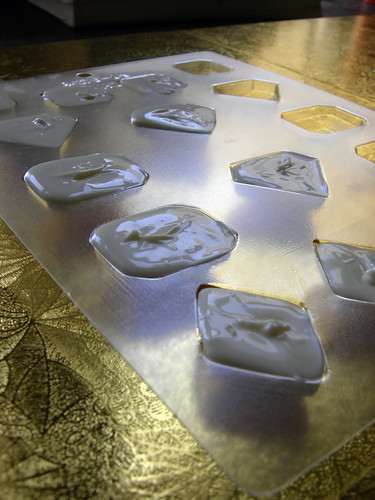
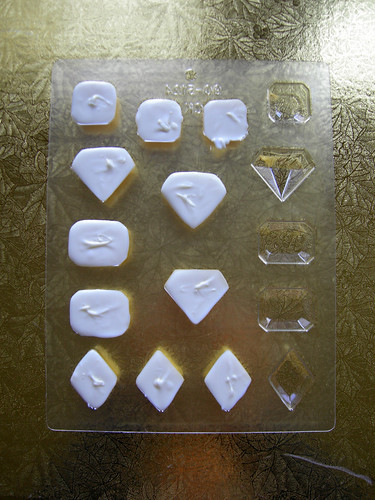

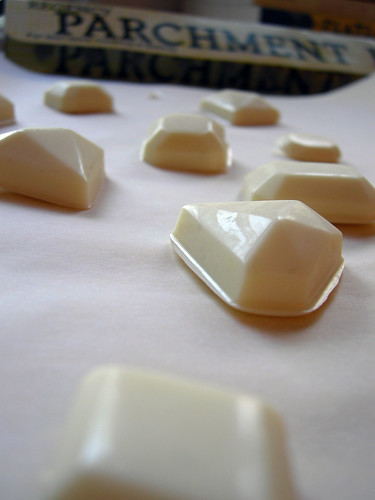
I squeeled and clapped like a three year old girl watching Barney when the chocolate came out of the molds with ease. Total sucess! The theme to Rocky was rolling through my head. My friends, today I was a champion. I kicked that chocolate's ass and showed it who's boss. Now all the little guys needed were a paint job.
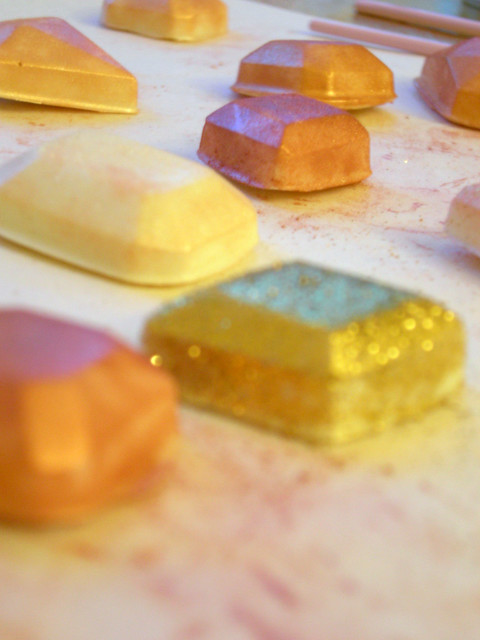
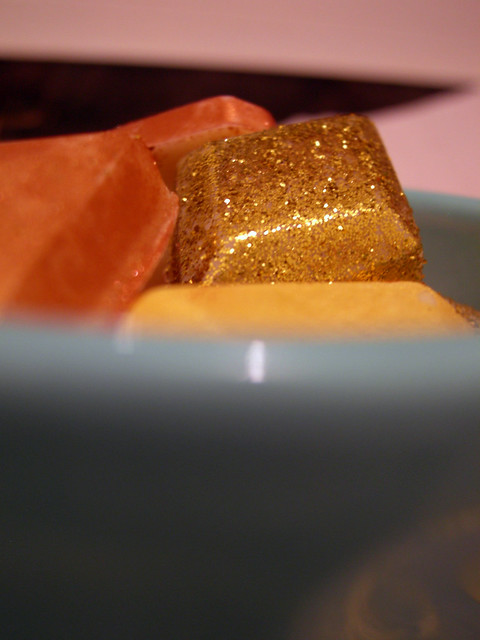
I had a ton of fun playing around with all the different forms of edible gold luster I bought. The spray on worked really well and gave the chocolate a glossy, even coat of gold paint. It was thick, and getting the spray control right was a bit tricky, but I was really happy with the results. Next, I tried the Disco Dust. This stuff looked just like craft glitter and stuck to the surface of the chocolate as if it were glue. A few coats later and I had some really shiny gems on my hands. You could literally hang them from the ceiling in place of a disco ball, they were THAT shiny. The last technique I tried was brushing on the luster dust. I got 3 different shades of gold, and found that using the dust in its powder form to brush it on the chocolate was much easier than mixing it with clear vanilla extract and painting it on wet. It was like painting watercolor on plastic, and nothing stuck. The dry brush method worked like a charm and went really quickly without using a lot of luster dust to coat each piece. I could finally start to see my vision coming to life. Now I just need to make about 8 million more of these things.